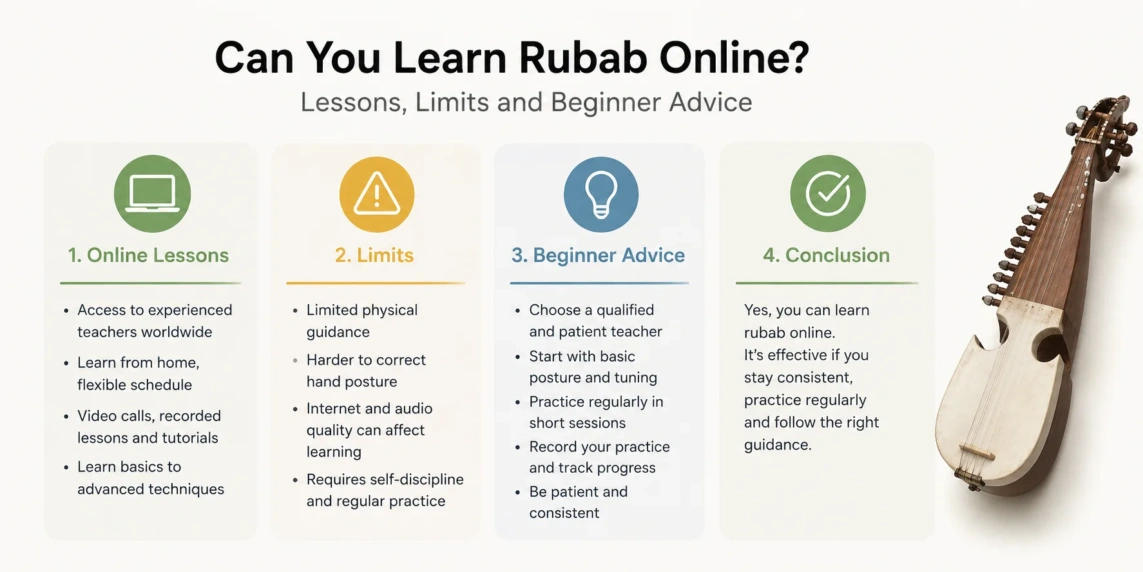
A beginner can learn the foundations of rubab playing online, provided that the teacher understands the exact instrument in the student’s hands and can see both playing hands clearly. Basic plectrum strokes and practice routines transfer well through video. Fine tone control, instrument setup, sympathetic-string tuning, physical tension, and advanced techniques may require more detailed, hands-on guidance.
The main question is therefore not simply whether rubab can be learned online. It is which rubab is being learned, what level the student hopes to reach, and how the lesson is organized. A recorded course may help someone explore the instrument. A live teacher is more useful for establishing technique. A mixed approach—live lessons, recorded practice, and occasional hands-on inspection—usually gives a beginner the clearest path.
Online learning is most workable when: the instrument is playable, the teacher works in the same rubab tradition, the camera shows the full playing position, the student can send unedited recordings, and tuning is checked before new material is introduced.
What Can Be Learned Online?
Online rubab lessons can support more than simple imitation. A teacher can demonstrate a stroke slowly, isolate a short phrase, watch the student repeat it, and compare several attempts. This works especially well when each lesson focuses on one visible or audible problem rather than a long list of new pieces.
| Skill | Online Suitability | What the Teacher Needs |
|---|---|---|
| Basic sitting position | Good | A full view of the player, shoulders, hands, and instrument |
| Plectrum grip and stroke direction | Good | A close side view of the right hand |
| Simple fingering and note placement | Good | A clear view along the neck or fingerboard |
| Scales and short phrases | Good | Slow demonstration, repetition, and recorded review |
| Basic tuning routine | Moderate | Correct instrument identification and clear string-by-string instructions |
| Tone and resonance control | Moderate | Good audio, unprocessed recordings, and careful listening |
| Bridge, peg, or skin problems | Limited | Detailed images and, in some cases, hands-on inspection |
| Advanced ornaments and regional phrasing | Moderate | A teacher grounded in the relevant performance tradition |
| Playing in real time with another musician | Limited | Very low delay or prerecorded accompaniment |
A student who wants to play a few short melodies may progress through online lessons alone. Someone seeking refined Afghan rubab technique, a specific Punjabi or Sikh rabab practice, a Central Asian rubob style, or a bowed rebab tradition will need a teacher whose knowledge matches that goal.
Identify the Instrument Before Booking Lessons
Rubab, rabab, rebab, rubāb, and rubob do not always name one standard instrument. The spellings overlap across languages and regions, while the instruments may differ in body form, neck length, fretting, string layout, soundboard material, and whether they are played with a plectrum or a bow.
This matters immediately in an online lesson. A teacher demonstrating Afghan rubab strokes cannot automatically provide suitable instruction for a bowed rebab. A course built around one Central Asian rubob may use note positions, tuning relationships, and repertoire that do not fit another form.
| Form or Tradition | Visible or Practical Clue | Teacher Knowledge to Confirm |
|---|---|---|
| Afghan or Kabuli rubab | A short-necked plucked lute, commonly with a skin-covered lower soundboard, melody strings, drone strings, and sympathetic strings | Afghan rubab posture, plectrum work, tuning relationships, and repertory |
| Central Asian rubob or rawap forms | Construction, neck length, frets, body outline, and stringing vary by regional type | The named regional form rather than a general “rubab” course |
| Punjabi or Sikh rabab practice | Modern instruments and teaching lineages may follow different reconstructions or performance approaches | The specific instrument design, musical setting, and teaching lineage used in the course |
| Bowed rebab forms | Played with a bow rather than a plectrum; body and holding position may be very different | Bow control, left-hand technique, and the relevant regional repertory |
Do not choose a lesson from the instrument name alone. Before paying for a course, send the teacher clear photographs of the front, side, pegbox, bridge, strings, and neck. A short video showing the instrument being held is even more useful.
Five Details the Teacher Should Confirm
- Whether the instrument is plucked or bowed
- Whether it has frets, tied frets, fixed frets, or an unfretted playing surface
- The number and purpose of its melody, drone, and sympathetic strings
- The condition of the bridge, pegs, strings, and soundboard
- The regional style and repertory the student wishes to learn
Exact string counts should not be guessed from the word rubab. Even within a named tradition, instruments may differ by size, maker, period, or intended use.
Skills That Transfer Well Through a Screen
Right-Hand Plectrum Control
The right hand is one of the easiest areas to observe online when the camera is placed correctly. A teacher can check how deeply the plectrum enters between the strings, whether the wrist remains loose, and whether downstrokes and upstrokes follow the intended pattern.
Early work should use open strings and slow repeated strokes. This removes left-hand difficulty and lets the student hear whether each attack is even. String crossing can be added once the stroke returns to the same path without unnecessary arm movement.
Basic Left-Hand Placement
A close view of the neck helps the teacher see collapsed finger joints, an awkward thumb position, excessive pressure, and fingers that lift too far from the playing surface. On fretted rubab forms, the student also needs to understand where the string should be stopped in relation to the fret. On other forms, the teacher may rely more heavily on listening and pitch comparison.
Online instruction works best when the student plays only a few notes at a time. A blurred hand moving through a full melody reveals far less than a slow, repeated two-note change.
Short Melodic Phrases
Small phrases are well suited to remote teaching. The teacher can play a phrase, name or sing its pitches, show the stroke order, and ask the student to answer. This call-and-response pattern avoids the delay problems that appear when two people try to perform together over a normal video connection.
Notation can help, but it should not replace listening. Depending on the teacher and tradition, lessons may use staff notation, letter names, sargam syllables, fingering numbers, oral repetition, or a mixture of these methods.
Rhythm and Stroke Patterns
A student can practise against a metronome, a hand-clapped pulse, or a prerecorded percussion track. The teacher can then listen for uneven accents, rushed string changes, and places where the right hand loses its repeated motion.
Real-time unison playing is less reliable. Network delay makes the teacher’s sound reach the student late, while the student’s reply returns late again. Taking turns is usually more accurate than trying to stay together live.
Where Online Rubab Lessons Have Clear Limits
Video Audio May Change the Sound
Video-meeting platforms are often designed to make speech clear. Noise reduction, echo control, automatic volume adjustment, and other processing may treat an instrument as background sound. Repeated notes can become uneven, quiet resonance may disappear, and a sharp attack may be softened or cut.
Music or original-audio settings can improve the result, but they do not make every microphone neutral. A phone may still exaggerate the initial pluck while missing the longer decay of the sound.
Listening Note: The student should send a short recording made with the normal camera or voice-recording application, not only the lesson platform. An unedited recording gives the teacher a second version of the tone, attack, buzzing, and sympathetic resonance.
The Teacher Cannot Feel Physical Tension
A teacher in the same room can notice resistance in the hand, reposition the instrument, or demonstrate how little pressure is needed. Online, physical tension must be inferred from posture, movement, facial expression, and the student’s description.
That makes honest reporting important. Pain, numbness, sharp discomfort, or persistent strain should never be hidden in order to complete an exercise. Finger sensitivity may change as a beginner practises, but joint, wrist, shoulder, or nerve pain is not a normal achievement marker.
Instrument Faults Can Look Like Playing Faults
The Afghan rubab and several related forms place the bridge on a skin soundboard. String tension, bridge position, skin condition, peg fit, string height, and the seating of the strings can all affect response. A student may keep changing technique when the real problem lies in the instrument.
Sympathetic strings add another layer. They need accurate tuning to respond clearly. If they are far from their intended pitches, the instrument may sound dry or confused even when the main melody strings are played correctly.
Luthier’s Note: Do not move a bridge, alter string height, tighten a skin, enlarge a peg hole, or replace strings from a generic online instruction alone. The correct action depends on the instrument’s construction and present condition.
Fine Regional Style Needs More Than Correct Notes
Rubab playing is shaped by stroke weight, timing, ornament, repeated-note treatment, phrasing, drone use, and the relationship between melody and pulse. A beginner may reproduce the notes of a piece while missing the movement that gives the phrase its local character.
A suitable teacher should therefore do more than provide tablature or finger numbers. The lesson needs listening examples, slow demonstrations, corrected imitation, and an explanation of where accents or ornaments belong.
Recorded Courses, Live Lessons, or a Mixed Method?
Each online format solves a different problem. The most suitable choice depends on whether the student needs exploration, correction, scheduling freedom, or close stylistic guidance.
| Format | Best Use | Main Benefit | Main Limit |
|---|---|---|---|
| Free demonstration videos | Exploring the instrument and observing basic movements | Easy replay and no fixed schedule | No personal correction or instrument check |
| Structured recorded course | Following lessons in a set order | Clear sequence and repeatable demonstrations | The course cannot see the student’s errors |
| Live one-to-one lesson | Establishing posture, stroke, fingering, and practice habits | Immediate personal feedback | Dependent on camera, audio, and connection quality |
| Small online group | Shared repertory, routine, and peer motivation | Lower individual cost and a social learning setting | Less observation time for each student |
| Recorded feedback | Students separated by time zones or unstable connections | The teacher can replay the student’s performance | Questions are not answered immediately |
| Mixed online and in-person study | Long-term learning, setup checks, and advanced technique | Regular remote contact with occasional hands-on correction | Requires access to a suitable teacher or repairer |
For a complete beginner, live individual lessons supported by short recorded assignments offer a useful balance. Recorded material gives the student time to repeat. Live observation stops obvious errors from becoming habits. An occasional in-person check is valuable when the instrument itself raises doubts.
What a Productive Online Rubab Lesson Looks Like
A useful lesson does not need to cover many topics. It needs a clear order and enough time for the teacher to observe the student.
- Instrument and tuning check: The student shows the bridge, pegs, string path, and playing position. Main strings are checked before repertory begins.
- Uninterrupted review: The student plays the previous assignment without stopping for every small error.
- One main correction: The teacher chooses the issue that most affects control, such as plectrum depth, wrist stiffness, finger pressure, or pulse.
- Slow demonstration: The movement is shown from a useful camera angle and repeated at a speed that reveals the mechanics.
- Student repetition: The student performs a small unit several times while the teacher watches.
- Musical application: The corrected motion is placed inside a scale, stroke pattern, or short phrase.
- Assignment test: The student attempts the new exercise before the lesson ends, so unclear instructions can be fixed immediately.
- Recording instructions: The teacher states what to record, from which angle, and what should remain audible.
A lesson dominated by the teacher’s performance may be enjoyable, but it gives little evidence of the student’s posture, timing, or sound. The student needs enough playing time to be assessed.
How to Choose an Online Rubab Teacher
A skilled performer is not automatically a suitable beginner teacher. Remote teaching also requires clear camera demonstrations, patient error diagnosis, and a method for checking work between lessons.
Questions to Ask Before Enrolling
- Which rubab, rabab, rebab, or rubob forms do you teach?
- Does your course match the instrument shown in my photographs?
- Which musical tradition and repertory shape the lessons?
- How do you teach tuning, especially drone and sympathetic strings?
- Do you use notation, sargam, listening imitation, or a mixed method?
- Will you review short recordings between live lessons?
- Can you check basic bridge, peg, and string issues from photographs?
- What should a beginner be able to do before moving to a full piece?
- May the student record the lesson for private review?
Warning Signs
- The teacher treats every instrument called rubab or rabab as the same.
- A fixed tuning is prescribed before the instrument and repertory are identified.
- The first lessons jump into a long piece without posture or stroke work.
- The teacher rarely watches the student’s hands.
- Buzzing, slipping pegs, or unstable tuning are always blamed on practice.
- Progress is measured only by how many pieces have been memorized.
A good teacher should be comfortable saying that a physical fault cannot be judged safely on video. That restraint protects both the student and the instrument.
Camera and Audio Setup for Rubab Lessons
A costly studio is not required. Stable placement, useful angles, and clear light matter more than decorative equipment.
The Main Camera View
The primary view should include the student’s upper body, both hands, the full neck, the bridge area, and most of the instrument body. The camera should sit slightly to the right or left rather than directly in front of the instrument. A mild diagonal view shows depth and makes plectrum movement easier to read.
The Right-Hand View
For stroke correction, place the camera near the level of the strings. The teacher should see the wrist, plectrum, bridge area, and the path of the stroke. A high camera angle may hide how deeply the plectrum enters between the strings.
The Left-Hand View
The camera should show the thumb, finger joints, and contact point on the string. On a fretted instrument, the frets must remain visible. Avoid placing the camera so close that hand movement leaves the frame.
Minimum Useful Equipment
- A phone, tablet, or computer with a stable camera
- A tripod, clamp, or firm stand
- Light falling toward the hands rather than from behind the player
- A quiet room with limited echo
- A tuning device or application suited to the teacher’s method
- Headphones when required by the audio settings
- A second device for playing reference recordings, when available
An external microphone can help, yet it is not the first purchase every beginner needs. Correct placement, speech-processing settings, and an unedited backup recording often provide more useful improvement.
Audio Settings Worth Checking
- Turn off aggressive background-noise reduction when the platform allows it.
- Use a music, original-audio, or high-fidelity mode if available.
- Test whether the instrument disappears when notes become quiet.
- Avoid automatic volume changes that make soft and loud strokes sound alike.
- Use headphones if disabling echo control causes feedback.
- Make a ten-second test recording before the lesson begins.
Platform menus change over time, so the setting names may not remain identical. The aim is consistent: preserve the instrument’s attack and decay without creating echo.
A Realistic Beginner Learning Sequence
Progress should be measured by control rather than by a promised number of days or weeks. A student with prior string-instrument experience may move quickly through one stage and slowly through another.
Stage 1: Make the Instrument Lesson-Ready
- Identify the rubab type and regional teaching approach.
- Confirm that the bridge, strings, and pegs appear functional.
- Learn the names and roles of the strings used in the first lessons.
- Establish a stable sitting position.
- Learn how the plectrum is held in that teaching tradition.
Stage 2: Produce a Controlled Open-String Sound
- Play repeated downstrokes without gripping the plectrum too tightly.
- Add upstrokes without changing the hand position.
- Move between selected strings without striking unwanted courses.
- Compare loudness, attack, and duration from one stroke to the next.
Stage 3: Coordinate Both Hands
- Stop a small set of notes cleanly.
- Coordinate finger contact with the plectrum stroke.
- Use slow scale fragments or two-note patterns.
- Keep the pulse steady while changing strings.
Stage 4: Play a Complete Short Melody
- Divide the melody into brief phrases.
- Learn the stroke sequence and finger movement for each phrase.
- Join the phrases without adding pauses at every boundary.
- Record one full attempt without editing.
Stage 5: Begin Style-Specific Work
- Shape repeated notes and accents according to the repertory.
- Add ornaments only after the underlying notes are stable.
- Learn how drones or sympathetic resonance support the phrase.
- Compare the student’s performance with a teacher-approved listening example.
The final stage listed here is still early study. Regional command develops through sustained listening, corrected repetition, and repertory learned from a suitable teacher.
How to Practise Between Online Lessons
Long sessions are not automatically productive. Rubab practice is easier to assess when each session has a narrow task and ends with a short recording.
- Check the instrument: Listen for slipping tuning, new buzzing, or a moved bridge before assuming the hands are at fault.
- Choose one movement: Work on a stroke, string crossing, finger change, or two-note connection.
- Reduce the speed: Play slowly enough to notice where the motion changes.
- Add a steady pulse: Use counting, clapping, a metronome, or a simple recorded beat.
- Place it in a phrase: Use the corrected motion in a small musical unit.
- Record one uninterrupted attempt: Do not edit out the difficult bar.
- Write one observation: Note a visible or audible issue for the next lesson.
Stop Repeating and Ask for Help When
- Pain, numbness, or sharp discomfort appears.
- The wrist or shoulder becomes more rigid with each attempt.
- The instrument will not hold tuning.
- A buzz remains even when the note is stopped carefully.
- The bridge appears tilted, shifted, or unstable.
- The student cannot tell which string or stroke the teacher demonstrated.
- Every repetition produces a different motion and no clear cause is visible.
Repeating an uncertain movement many times can make it harder to replace later. A brief question or a close-up recording is often more useful than another hour of guesswork.
Beginner Errors That Online Lessons May Hide
Playing Too Hard for the Microphone
Built-in microphones may fail to capture quiet detail. A student can begin striking harder simply to sound clearer in the call. This changes the hand, reduces dynamic control, and may create a harsh attack that is less obvious after audio processing.
Copying a Mirrored Image
Some video applications show a mirrored self-view. The teacher and student should confirm whether the transmitted image is also mirrored. Stroke direction and left-right orientation can otherwise become confusing, especially when lessons rely on imitation.
Watching the Face Instead of the Hands
A normal conversation view often centers the head and shoulders. That is poor framing for instrument teaching. The teacher needs to see the relation between the body, neck, bridge, and both hands.
Learning Whole Pieces Before Building Control
A student may feel progress after memorizing a melody, even while using an unstable plectrum grip or uneven stroke pattern. Short technical units should support the piece, not be skipped in order to finish it quickly.
Using Instructions for Another Rubab Form
A video may look close enough to follow while using a different neck, fret layout, string order, bridge, or musical system. The student should verify that the lesson belongs to the same instrument and tradition before copying tuning or fingering.
Judging Tone Only Through the Call
The sound heard by the teacher may not match the sound in the room. Comparing the live call, a local recording, and the student’s own listening gives a more reliable picture.
When Hands-On Help Is the Better Choice
Online teaching should not be used to force an answer when the instrument needs physical inspection. A local rubab maker may not be available, but an experienced luthier familiar with skin-soundboard lutes can still help identify mechanical concerns. The student should explain the instrument type before any work begins.
Seek Instrument Inspection For
- Pegs that repeatedly slip or jam
- A bridge that leans, moves, or no longer sits correctly
- Strings that seem too high, too low, or poorly aligned
- A skin soundboard that appears loose, damaged, or uneven
- Persistent buzzing across several notes or strings
- Sympathetic strings that cannot be tuned or do not clear adjacent parts
- Uncertainty about suitable replacement strings
Seek In-Person Playing Support For
- Recurring wrist, finger, shoulder, neck, or back pain
- A playing position that remains unstable from every camera angle
- A plectrum motion that the teacher cannot diagnose remotely
- Advanced ornaments that remain unclear after slow video study
- Ensemble timing and musical response with other players
- Performance preparation that requires close control of projection and tone
Health Note: Pain is not a normal price of learning rubab. Stop the movement and seek suitable professional advice when pain, numbness, weakness, or persistent discomfort develops.
Choosing the Right Learning Path
| Student Situation | Suitable Starting Method | Reason |
|---|---|---|
| Curious about the instrument but not yet committed | Teacher-approved introductory videos or a short trial lesson | Allows basic exploration before buying a long course |
| Owns a playable instrument and wants basic melodies | Live online lessons with recorded practice | Provides correction while keeping study accessible |
| Does not know which rubab form is owned | Identification session before regular lessons | Prevents mismatched tuning, technique, and repertory |
| Has unstable tuning or structural concerns | Instrument inspection before technical study | Practice cannot correct a mechanical fault |
| Wants a defined regional style | A teacher from that performance and teaching lineage | Notes alone do not carry phrasing, stroke weight, and ornament |
| Plans advanced or performance-level study | Mixed online and in-person learning | Combines regular access with close physical and acoustic correction |
Online-only study can be enough for an informed beginning. It becomes less dependable when the student cannot identify the instrument, cannot hear its unprocessed sound clearly, or needs help with setup and physical technique. The point at which in-person support becomes useful is different for every player.
Frequently Asked Questions
Can a Complete Beginner Learn Rubab Online?
Yes. A complete beginner can learn sitting position, plectrum grip, open-string strokes, basic fingering, short phrases, and a practice routine online. Live feedback is preferable during the first stages because small hand errors are easier to correct before they become habitual.
Do I Need an Afghan Rubab for Online Lessons?
Only if the course teaches Afghan or Kabuli rubab. Other instruments may also be called rabab, rebab, rubāb, rubob, or rawap. The teacher should identify the instrument from photographs and confirm that the course matches its construction and playing method.
Can a Rubab Teacher Tune My Instrument Through Video?
A teacher can explain string roles, demonstrate pitch relationships, and listen to a beginner’s tuning through video. The process may be slower when the instrument has many sympathetic strings or poorly fitting pegs. Unstable hardware may require physical inspection.
How Often Should a Beginner Take Online Lessons?
A regular lesson schedule is more useful than an isolated long session. The exact interval depends on the student’s practice time and the teacher’s method. There should be enough time to repeat the assigned movement, make a recording, and identify questions before the next lesson.
Is a Recorded Rubab Course Enough?
A recorded course can introduce technique and repertory, but it cannot see incorrect posture, excess tension, poor plectrum depth, or an instrument fault. Beginners usually benefit from at least occasional live review.
Can the Teacher and Student Play Rubab Together Online?
Normal video calls often introduce enough delay to disturb shared rhythm. Taking turns, using a metronome, or playing with a prerecorded accompaniment is usually more dependable. Low-delay audio tools may improve the situation, but they require suitable equipment and connection quality.